Setting up different Profiles in GP5
The GP5 program now has the ability to set up multiple Profiles within the program to make it easy to
switch between different user accounts.
This is especially handy in situations where a single computer may be shared between two or more students taking classes online at either the same or different schools that use GP5 to attend classes.
The Profiles feature will also allow students to set up multiple profiles so they can attend online classes at different schools that have different user names, passwords and display name requirements.
You can create as many Profiles as you need but you must
enable the Multiple Profiles option in the GP5 Preferences.
Setting up profiles is a quick process and should only be required once for each user account.
Once a profile is created in GP5 it is a simple matter to
switch between any of the profiles to gain access to the correct classes.
If GP5 was previously configured with an account, a Profile will be automatically created using the account information.
If GP5 was not previously configured you will need to
add a new Profile as outlined below.
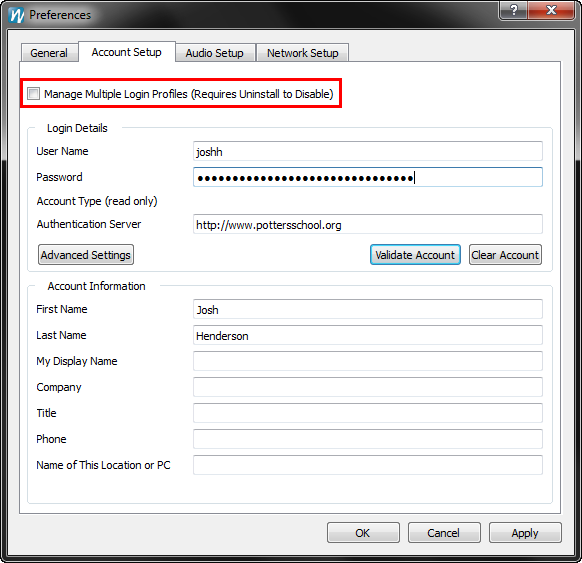
- Select Preferences from the Tools menu in GP5 (Mac users can find the Preferences in the gp5 menu).
- Click the Account Setup tab on the Preferences dialog and select the Manage Multiple Login Profiles checkbox.
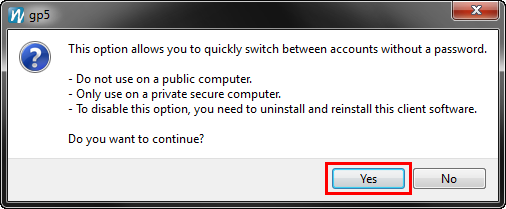
- Click the Yes button on the Multiple Profiles information prompt.
Some schools have a way to Auto-configure GP5 by logging into the school web site and clicking on an Auto-configure link.
If there is an Auto-configure method available from the school that you attend, you can quickly add a new profile to GP5 by simply Auto-configuring GP5.
After you Auto-configure GP5 for the student, the student name will appear in the Profiles list and menu and it will be the current profile selected.
When you Auto-configure GP5, the Profile name will be set to the
User Name initially but the Profile names are editable so you can
change them to make them more meaningful.
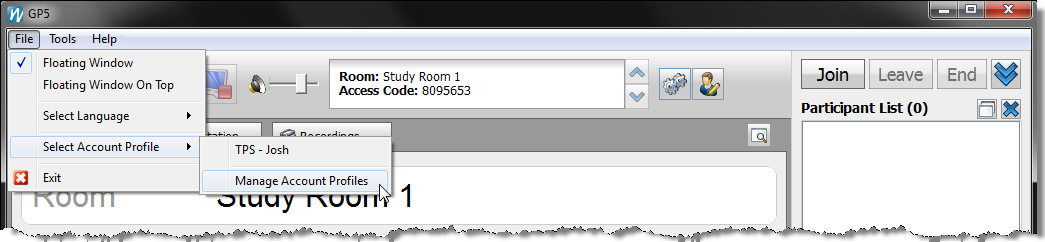
If the school you attend does not have an Auto-configure method available then you can manually add a Profile by doing the following.
- Choose the Select Account Profile menu item from the File menu and then select the Manage Account Profiles option from the sub-menu to open the Preferences dialog.
- Click the New button to the right of the Profile Name drop-down menu on the Preferences dialog.
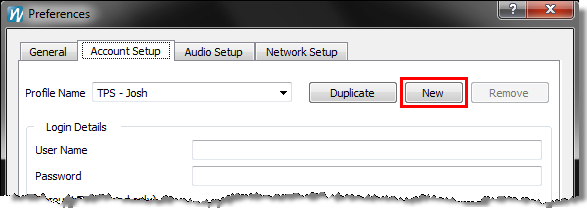
- Select the default Profile Name and change it to anything you want that will help you identify what school/account and user it will be configured for.
- A) If the school requires a User Name and Password, enter them in the Login Details section and click the Validate Account button. Click the OK button once your receive the successful validation message.
B) If the school does not require a user name and password then enter the First Name, Last Name and/or Display Name as required by the school and click the OK button.
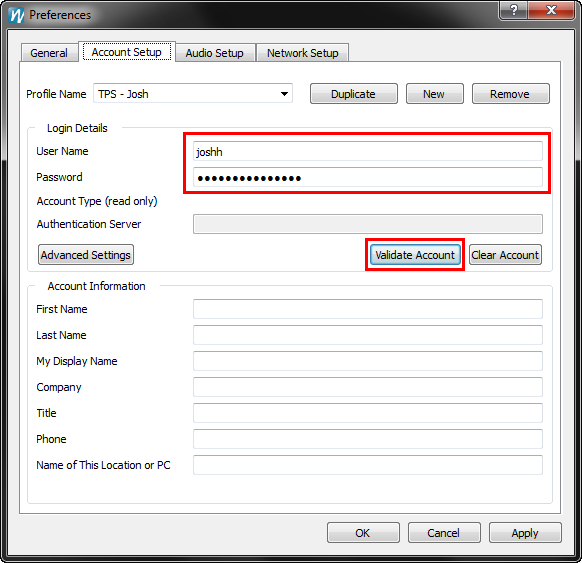 | | A) For schools that REQUIRE a User Name and Password. |
| 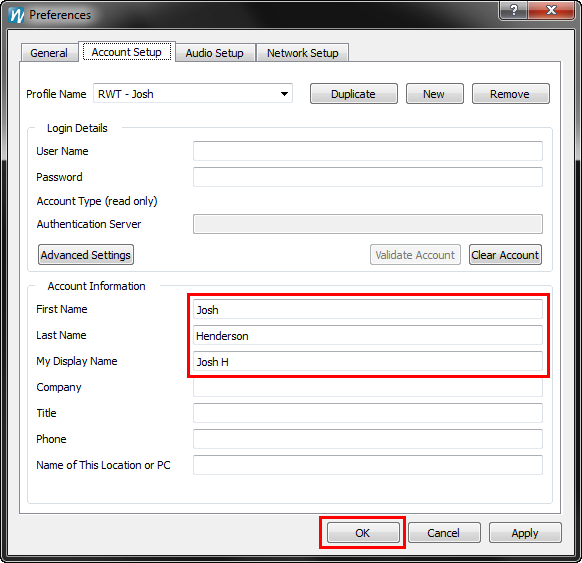 | | B) For schools that DO NOT require a User Name and Password |
|
To change to a different profile, simply choose the
Select Account Profile menu item from the
File menu and then select the desired Profile from the Profiles sub-menu.
After you select a different Profile from the menu, you should see a successful login validation message if your school requires a user name and password to log in.
If the school does not require a user name and password then you will not see the login validation message.
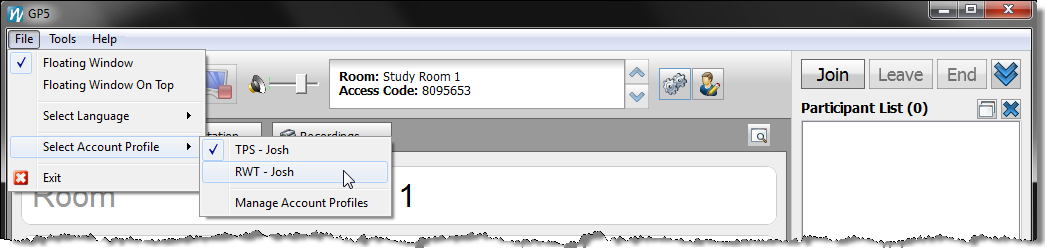 |
| Selecting a different Profile from the Account Profiles menu. |
Profile names are editable so the user can change them at any time to make them more meaningful or tell them apart from the other Profiles listed.
For example, if a student takes classes at two different schools, they can title the Profiles with the school name as part of the Profile name so they can tell quickly which one they should select for the class they need to attend.
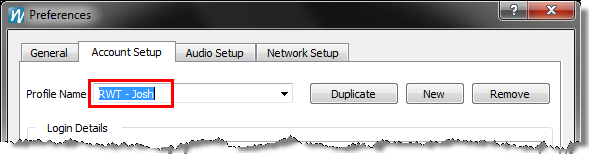
In the example below, Josh has classes at TPS and RWT so the Profiles were titled with TPS and RWT as well as his name to make it easy to tell the difference between the two Profiles.
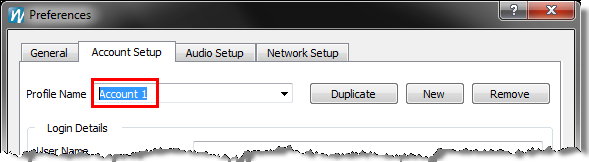
To edit a profile name open
Account Profiles, select the profile from the drop-down menu of
Profile Names, select the text of the Profile Name and type in a new name.
 |
| Profile name selected. |