Guide for Java Client version 4.2.0.x
The Java client for both the Host and Guests has been updated with significant changes both visible and behind the scenes. Of note, are the ability for Mac users to use the VoIP option and new control panels for both the host and guests that have been granted presentation rights or are receiving remote support. Below is a quick guide to the new look and features now available. Details on each of the
Participant Menu Options Participant Info and
Capabilities can be found after the quick reference section.
Note: The voice options are only available for VoIP enabled meetings on Macintosh and Windows computers. Linux users
will not have the voice options.
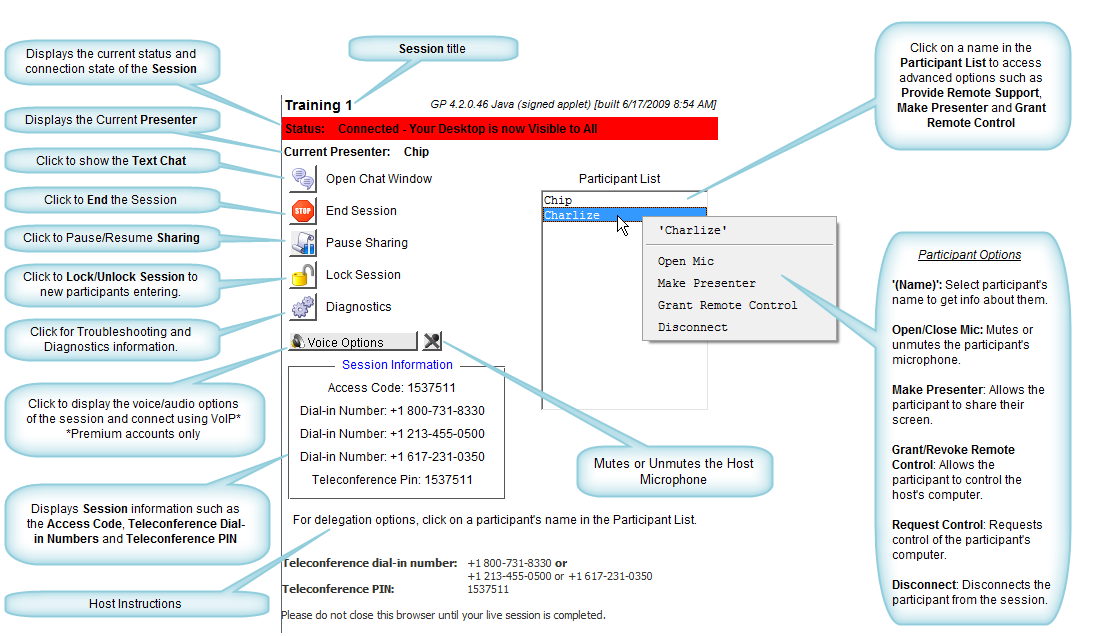
Host Panel Overview
Based on customer input, the Host interface has been modified significantly to improve the user experience. The buttons have been rearranged vertically and labels added which reflect the action that will occur when the button is clicked.
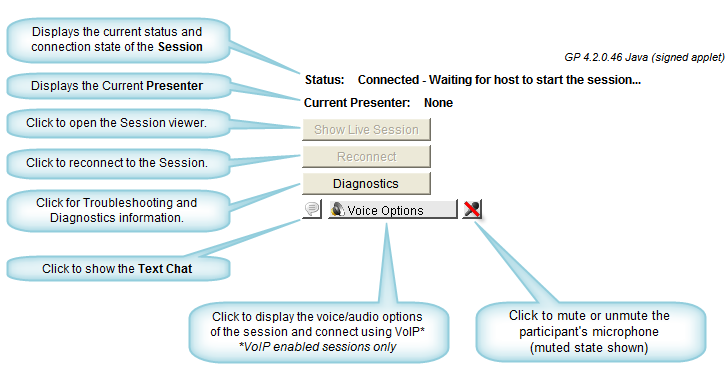
Guest Interface Overview
The guest interface has changed little in the outward appearance when a guest first joins the meeting. However, if the guest is granted presentation rights, control of the host's computer, or is being provided with remote support, their control panel will change significantly as shown below.
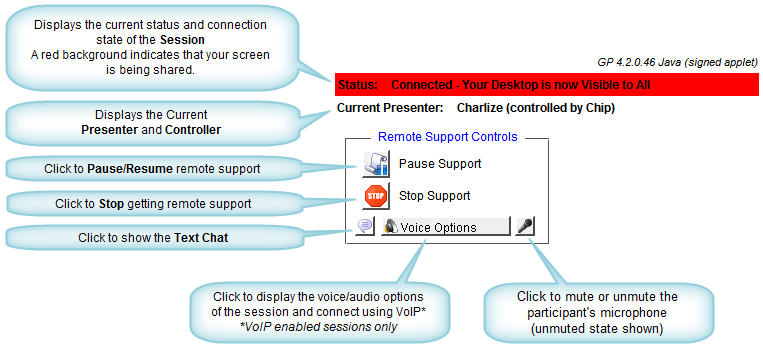
Guest Control Panel when Granted Remote Control of Another Computer

The Participant list menu has changed and now offers more information about the guests in a meeting. Clicking on a name in the Participant list will show a menu with options for that guest.
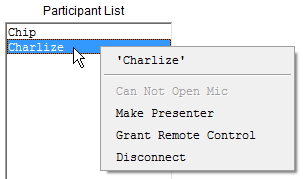
When a capability is not available for a specific guest, the option is disabled (grayed out) in the menu and the option name is changed to include the text 'Can not'. Participant options may not be available for a number of reasons, such as the joining method (Java or SureView), the participants version of Java my be too old, the availability of audio devices on the participant's computer, etc. See this
Capabilities section below for possible causes and corrective actions to add capabilities for the participants.
The sections below will detail each of the menu options and their function in a meeting.
Selecting the guest's name from the menu will display the capabilities and other information about that guest. In the example above, the microphone can not be opened for Charlize so the normal
Open Mic menu option is re-named to
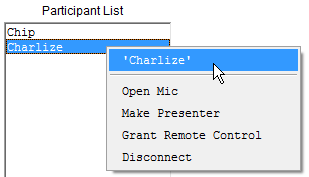
Can Not Open Mic and is disabled. In the example below, Charlize does have the ability to speak so the
Open Mic menu option is available under the list of options. For more details on the Info dialog, see the
Info Dialog section below.
The Open Mic Option
Note: This option will be disabled and named [i]Can Not Open Mic[i] if the participant has not added voice, has a version of Java that does not support voice, (v1.3 or higher required) or has joined using SureView.
Selecting the
Open Mic option will un-mute the microphone for that participant. Once the microphone has been opened for the participant, the menu item for that participant changes to
Close Mic.
Selecting the
Close Mic option will mute the microphone for that participant.
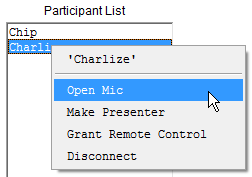 | | Select the Open Mic option to un-mute the participant. |
| | 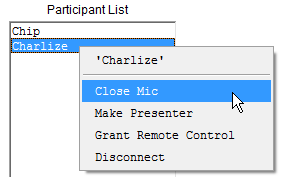 | | Select the Close Mic option to mute the participant |
|
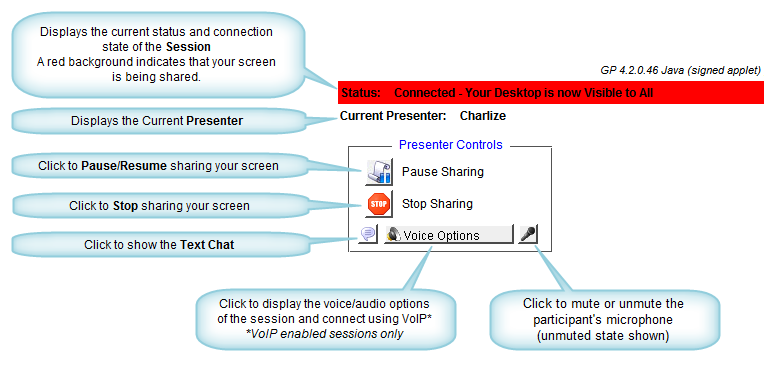
Selecting this option will prompt the participant to share their screen with the rest of the guests in the meeting. If they click the
OK button at the prompt, they will become the presenter in the meeting and everyone will see their screen. While the guest is the presenter in the meeting, their control panel will change to the
Guest Presenter Control Panel as
shown above.
To stop the participant from presenting, and switch their control panel back to the
Standard Guest Control Panel, select the Stop Presenting option for that participant.
Note: While the guest is presenting, the
Grant Remote Control menu changes to the
Request Control option.
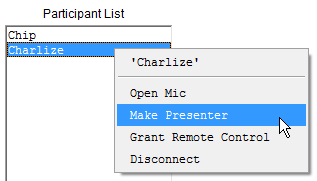 | | Select Make Presenter to prompt the participant to become the presenter. |
| 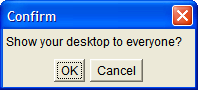 | | Participant is prompted to share their screen. |
| 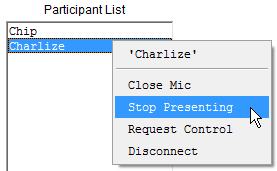 | | Select Stop Presenting to stop the participant from presenting. |
|
The Request control option is only available for a participant once they have
been granted presentation rights. Selecting this option will prompt the participant to allow the host to remote control their computer. If they click the
OK button, the host will be prompted that they are in control of the remote computer and a viewer window will open to show the controlled participant's screen to the host and the other participants in the meeting.
To stop remote controlling the participant's computer, select the
Stop Controlling option from the menu under the participants name on the host control panel. The guest can also click the
Pause Support or
Stop Support button on their
Guest Remote Support Control Panel to pause or stop the remote support.
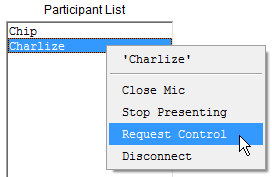 | | Select Request Control to prompt the participant to be provided with remote control/support. |
|  | | Participant is prompted to be provided with remote support |
| 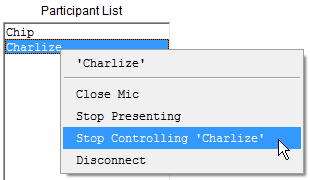 | | Select Stop Controlling (name) to stop providing the participant with remote control/support. |
|
The Grant and Revoke Remote Control Options
Note: This option is disabled while the host is not sharing their screen. To enable it, click the Resume Presenting button on the host control panel. Selecting this option will prompt the participant that they are in control of the host's computer. This is useful if the guest must do a specific task on the host's computer or when the host is demonstrating something that the guest may not have installed locally and the guest wants to try it.
To stop the participant from controlling the host's computer, the host must select
Revoke Control from the menu under the participants name.
Note: While the participant is controlling the host's computer, there is a disabled
'(guest name)' Is Controlling Me menu option on the host's control panel to show that they are the controlling the host's computer.
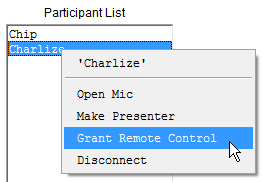 | | Select Grant Remote Control to grant remote control to the participant. |
| 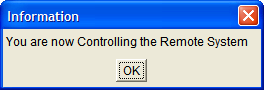 | | Participant is prompted that they are controlling the remote computer. |
| 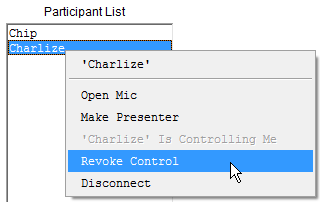 | | Select Revoke Control to revoke remote control from the participant. |
| 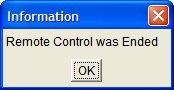 | | Participant is prompted that remote control has been terminated. |
|
The Disconnect Option
This option will disconnect the participant from the meeting. There is no complimentary menu option for this selection.
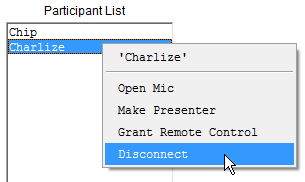 |
| Selecting Disconnect will disconnect the participant from the meeting. |
The Info Dialog
The Info dialog is comprised of three sections and, depending on how the guest joined the meeting, their capabilities and information will vary as shown below. The first section at the top lists the participant's name and the client they used to join the meeting. The middle section displays the capabilities and state of the capabilities for the participant while the lower section lists information about the client version, the operating system, Java version, and screen resolution of the participant.
Note: The Java participant (on the left below) does have the capability to control, present, chat, and speak whereas the SureView participant (on the right) has no capabilities. This is because SureView is purely a viewer and is incapable of two-way communication. In order to have advanced features, such as the ability to speak, present, moderate or control, the guest must use the Java client and have version 1.4 or higher of
Java installed and enabled. Guests can also optionally install the free GatherPlace guest client which is available here:
http://www.gatherplace.com/client/ 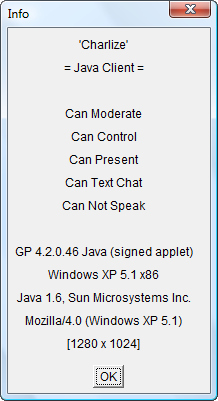 | | Guest joined using the Java client but has not added voice (Can Not Speak). |
| 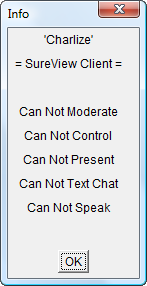 | | Guest joined using the SureView client. |
|
Along with the current capabilities of the participant, the Info dialog will also contain the current state of a capability (if they are muted, are presenting, etc) if that capability has been invoked for the guest. An example of this is when a guest first joins a VoIP enabled meeting and has not yet added voice. In this case the Info will show 'Can Not Speak' for that participant, but once the guest adds voice, the Info dialog will show the muting state of the guest.
Note: The Info dialog must be closed and re-opened to reflect any changes in the capabilities if they occur while the dialog is open.
The lower section will only contain information if the participant joined the meeting using the Java client and will include information on the applet version, their operating system, the installed Java version, and their current screen resolution. This information is very helpful in determining why a participant may not have certain capabilities.
The Capabilities, What They Mean and How to Enable Them
Participants that join with the SureView client/method will NOT have ANY capabilities as SureView is a one-way viewer and cannot send any information back into the meeting.
| Capability | Description | Possible Cause(s) | Solution(s) |
| Moderate | Participants that are made Moderators will receive text chats that are sent to 'All Moderators'. Moderators may also have additional elevated privileges in the future. | (1)Participant joined with SureView
(2) Participant has an older version of Java.
(3) Participant did not accept the security warning when joining the meeting. | (1) Have participant leave the meeting and install and re-join using Java.
(2) Upgrade Java version at http://java.com/
(3) Have participant leave the meeting and accept the security warning when they re-join the meeting. |
| Control | Participant can be given control of another computer in the meeting. | (1) Participant joined with SureView
(2) Participant has an older version of Java.
(3) Participant did not accept the security warning when joining the meeting. | (1) Have participant leave the meeting and install and re-join using Java.
(2) Upgrade Java version at http://java.com/
(3) Have participant leave the meeting and accept the security warning when they re-join the meeting. |
| Present | Participant can be granted Presentation rights so they can share their screen with others in the meeting. | (1) Participant joined with SureView
(2) Participant has an older version of Java.
(3) Participant did not accept the security warning when joining the meeting. | (1) Have participant leave the meeting and install and re-join using Java.
(2) Upgrade Java version at http://java.com/
(3) Have participant leave the meeting and accept the security warning when they re-join the meeting. |
| Text Chat | Opening the Text Chat window allows the participant to view and respond to any public or private text messages in the meeting. | (1) Participant joined with SureView
(2) Participant has an older version of Java.
(3) Participant did not accept the security warning when joining the meeting. | (1) Have participant leave the meeting and install and re-join using Java.
(2) Upgrade Java version at http://java.com/
(3) Have participant leave the meeting and accept the security warning when they re-join the meeting. |
| Speak | This option is only available in VoIP enabled meetings. It allows the participant to use their computer for the audio portion of the meeting instead of the telephone. | (1) Participant has not clicked the Add Voice button on the Voice Options dialog.
(2) Participant has the incorrect input device selected on the Voice Options dialog.
(3) Participant does not have an input device attached to their computer.
(4) Participant joined with SureView
(5) Participant has an older version of Java.
(6) Participant did not accept the security warning when joining the meeting. | (1) Have the participant click the Voice Options button at the top of the viewer window or on the Guest Control Panel and then select the desired audio devices and click the Add Voice button on the Voice Options dialog.
(2) Have the participant click the Voice Options button at the top of the viewer window or on the Guest Control Panel and then select a different input device and click the Add Voice button on the Voice Options dialog.
(3) Have the participant attach an audio input device to their computer, then click the Voice Options button at the top of the viewer window or on the Guest Control Panel and select the input device and click the Add Voice button on the Voice Options dialog.
(4) Have participant leave the meeting and install and re-join using Java.
(5) Upgrade Java version at http://java.com/
(6) Have participant leave the meeting and accept the security warning when they re-join the meeting. |